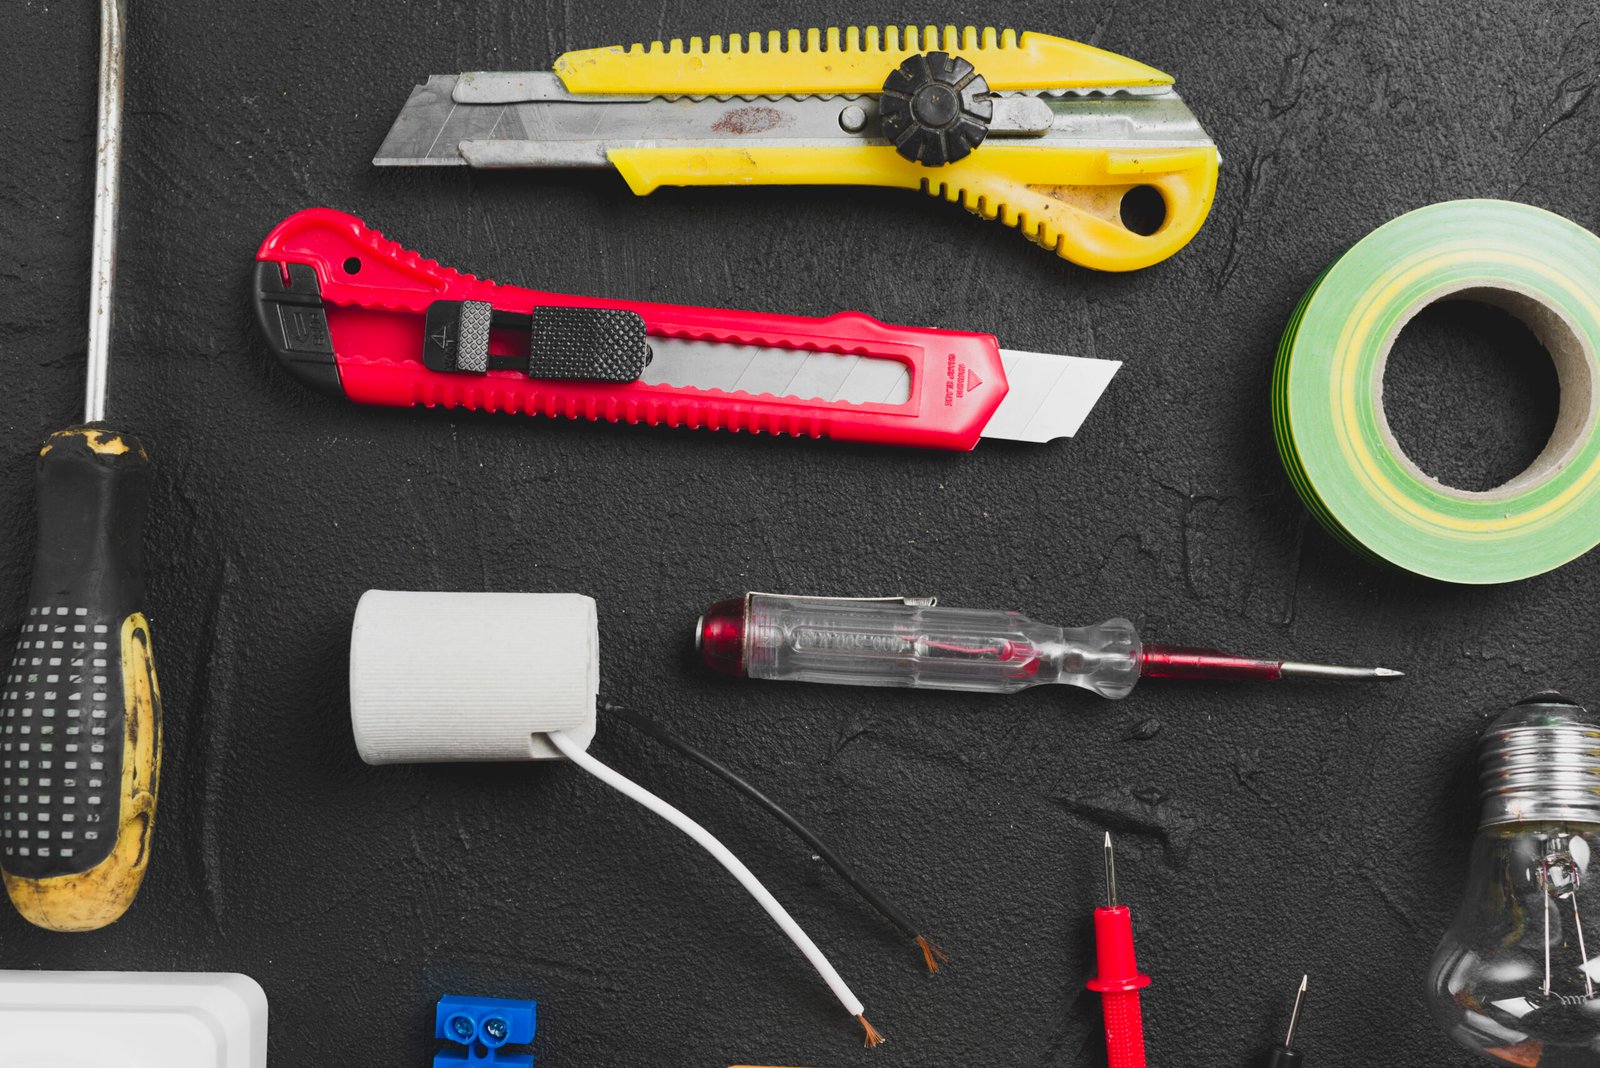
In the world of electrical work, having the right tools is crucial for efficiency, safety, and accuracy. Whether you’re a seasoned electrician or a DIY enthusiast tackling household projects, certain tools stand out as essentials in every toolkit. From wire strippers to multimeters, these tools are designed to make tasks easier, faster, and safer. In this guide, we’ll introduce you to the 12 most popular electrical hand tools that professionals and beginners alike rely on for a wide range of jobs. With these tools on hand, you’ll be well-equipped to handle everything from routine repairs to complex electrical installations.
1. Multimeter
2. Wire Strippers
3. Screwdrivers
4. Pliers
5. Cable Cutters
6. Crimping Tool
7. Voltage Tester
8. Fish Tape
9. Tape Measure
10. Utility Knife
11. Conduit Bender
12. Flashlight/Headlamp
Multimeter
A multimeter is an essential tool in electrical and electronic work, combining several measurement functions in one device to provide versatility and precision. It’s widely used by electricians, technicians, and hobbyists to troubleshoot electrical issues, test components, and verify voltage levels. Whether working on home wiring, automotive electronics, or circuit boards, a multimeter is indispensable for diagnostics and safe handling of electrical currents.
1. What is a Multimeter?
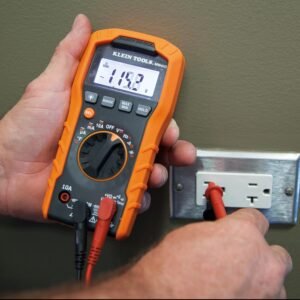
A multimeter is a handheld device designed to measure various electrical properties. The most common measurements are:
- Voltage (V): Measured in volts, used to verify that power is reaching a circuit or device.
- Current (A): Measured in amperes, showing the flow of electrical current.
- Resistance (Ω): Measured in ohms, used to detect resistance in components, which is essential for finding faults in circuits.
2. Types of Multimeters
There are two main types of multimeters: analog and digital.
Analog Multimeters: These feature a needle on a dial to display readings. Although less common today, analog multimeters are preferred by some for certain tasks like measuring changes in current because the needle movement can show subtle shifts more effectively than digital displays.
Digital Multimeters (DMMs): These display readings on an LCD screen, which provides clearer and more accurate readings than analog. Digital multimeters are more popular today due to their precision, additional functions, and ease of use.
Wire Strippers
Wire Strippers are essential hand tools in electrical work, used to remove insulation from wires and prepare them for connection. Their primary purpose is to strip the outer layer of insulation on a wire without damaging the conductor underneath, which is crucial for maintaining proper electrical connections and avoiding safety issues. Wire strippers are widely used by electricians, DIY enthusiasts, and anyone working with electrical wiring.
1. What Are Wire Strippers? 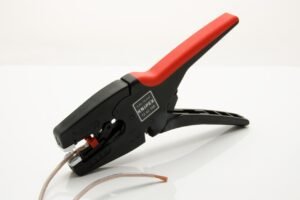
Wire strippers are hand tools with blades or notched cutting edges that grip the wire and strip away the insulation in one motion. They come in various designs, sizes, and functionalities, allowing users to work with different wire gauges (sizes) and insulation types. Some wire strippers have built-in features for additional tasks, making them versatile tools for many electrical projects.
2. Types of Wire Strippers
Several types of wire strippers are commonly used in electrical work, each designed for specific tasks and wire sizes:
Manual Wire Strippers: Basic, hand-operated strippers with notches for different wire gauges. The user aligns the wire in the appropriate notch, squeezes the handles, and pulls to remove the insulation. These strippers require some skill and control to avoid damaging the wire underneath.
Automatic Wire Strippers: These have a mechanism that automatically adjusts to the wire size, making them easier to use. When the handles are squeezed, the tool grips, strips, and removes the insulation in one motion. They are useful for repetitive tasks and provide consistent results.
Self-Adjusting Wire Strippers: These have adjustable jaws that adapt to the wire’s diameter automatically, making them ideal for users working with multiple wire sizes. They’re similar to automatic strippers but offer better versatility for various gauges.
Compound Wire Strippers: These combine wire stripping with additional functions like cutting, crimping, and bending. They are great multipurpose tools for those who prefer having one tool for multiple tasks.
3. Key Functions of Wire Strippers
Stripping Insulation: This is the primary function. Each notch on the tool corresponds to a specific wire gauge, allowing precise removal of insulation.
Cutting Wires: Many wire strippers come with built-in cutting blades near the handles. This feature allows users to cut wires to the desired length, saving time and reducing the need for multiple tools.
Crimping Terminals: Some wire strippers have crimping slots for connecting wire terminals. This feature is helpful for attaching connectors to wires securely.
Looping and Bending Wires: Some models have rounded jaws for creating loops or bends, a useful feature when preparing wires for screw-type connections.
4. Choosing the Right Wire Stripper
Choosing the right wire stripper depends on the type of wiring and the gauge (thickness) of the wires you work with. Key considerations include:
Wire Gauge Compatibility: Check the markings on the tool to ensure it can handle the wire gauges you need. A good wire stripper should have several notches for a range of gauges, commonly from 10 AWG (American Wire Gauge) to 22 AWG.
Comfort and Grip: Look for ergonomically designed handles, especially if you’ll be using the tool for extended periods. Insulated handles are also recommended for added safety when working with live wires.
Additional Features: If you need more versatility, consider a stripper with additional functions like cutting and crimping. For frequent use, an automatic or self-adjusting wire stripper can save time and effort.
5. Using Wire Strippers Safely
Safety is crucial when working with wire strippers, as improper use can damage wires or lead to electrical hazards. Here are some safety tips:
- Disconnect Power: Always ensure the power is off before stripping wires to avoid electric shocks.
- Use the Right Gauge Slot: Use the appropriate notch for the wire size to avoid damaging the conductor.
- Inspect the Tool: Make sure the cutting edges are sharp and free of nicks for clean stripping.
Screwdrivers
Screwdrivers are essential tools in any toolkit, especially for electricians and DIY enthusiasts. They come in various types, shapes, and sizes, each designed to fit a specific type of screw head, making them indispensable for tightening, loosening, and fastening screws in a wide array of applications, from household repairs to complex electrical work.
1. What Are Screwdrivers?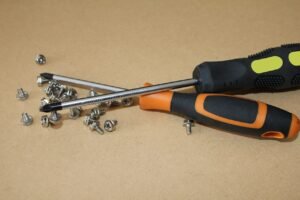
A screwdriver is a hand tool consisting of a handle, shaft, and tip. The tip fits into a corresponding screw head, and by applying torque, the screwdriver can drive or remove the screw. Screwdrivers are used in nearly every field: electrical, construction, automotive, carpentry, and even in electronic device repair.
2. Types of Screwdrivers
Screwdrivers come in a wide range of types to accommodate different screw heads. Here are the most common types:
Flathead (Slotted) Screwdriver: One of the oldest and simplest types, it has a flat tip that fits into screws with a single horizontal slot. Flathead screwdrivers are versatile and work well for various applications, but they can slip out of place easily.
Phillips Screwdriver: Known for its cross-shaped tip, the Phillips screwdriver is one of the most commonly used. It offers a secure fit for cross-slot screws, reducing the likelihood of slipping. Phillips screws are self-centering, making the screwdriver easier to use.
Torx Screwdriver: With a star-shaped tip, Torx screwdrivers are often used in automotive, electronics, and appliance industries. The star shape allows for better torque transfer and reduces wear on the screw head.
Pozidriv Screwdriver: Similar to the Phillips but with additional notches that provide extra grip, these screwdrivers are common in European applications, particularly in carpentry and construction.
Hex (Allen) Screwdriver: The hexagonal-shaped tip is commonly used for bolts and screws in furniture assembly, electronics, and bicycles. Hex screws allow for high torque and are often used in situations requiring secure fastening.
Insulated Screwdrivers: Specially designed for electrical work, insulated screwdrivers have non-conductive handles and shafts to protect users from electric shock. They’re essential when working with live circuits.
Precision Screwdrivers: These are small, high-accuracy screwdrivers used for delicate work on electronics, watches, and eyeglasses. They come in various tip types, including flathead, Phillips, and Torx.
3. Key Features of a Quality Screwdriver
A good screwdriver should be durable, comfortable, and precise. Here are some features to consider:
Ergonomic Handle: A comfortable, non-slip handle allows better control and reduces hand fatigue. Some handles are also cushioned or textured for a firmer grip.
Magnetic Tip: A magnetic tip helps hold screws in place, making it easier to position and drive screws, especially in hard-to-reach areas.
Quality Material: Tips made from hardened steel, chrome-vanadium, or other durable materials resist wear and maintain a good grip on screws.
Insulation: For electrical work, insulated screwdrivers protect against electric shock. Look for tools rated to withstand high voltages (e.g., up to 1000V) for safety.
Variety of Sizes: Having a range of sizes for each type of screwdriver tip ensures you have the right fit for each job, minimizing the risk of stripping the screw head.
4. Choosing the Right Screwdriver for the Job
Selecting the correct screwdriver is essential to avoid damaging screws or the material around them. Here are some guidelines:
Match the Tip to the Screw Head: Using the wrong type or size of screwdriver can strip the screw head, making it difficult to remove.
Consider the Task Requirements: For precision work, a smaller, more delicate screwdriver is ideal. For high-torque tasks, like working with construction-grade screws, a larger, more durable screwdriver is best.
Electrical Safety: When working with live circuits, insulated screwdrivers are a must to ensure personal safety.
5. Using Screwdrivers Safely
Improper use of screwdrivers can lead to accidents, so it’s essential to follow safety tips:
Apply the Right Amount of Pressure: Too much pressure can strip the screw or damage the material, while too little can cause the screwdriver to slip.
Avoid Excessive Force: Forcing a screwdriver can damage both the tool and the screw. If the screw won’t turn, try lubricating it or using a different screwdriver with a better fit.
Keep the Work Area Clear: A cluttered space can lead to accidental slips and injuries. Ensure you have a clear area to work.
Pliers
Pliers are essential hand tools used across various fields, from electrical work and plumbing to mechanics and DIY projects. Known for their versatility, pliers allow users to grip, bend, cut, and manipulate different materials, providing control and precision for tasks where fingers alone aren’t sufficient. Available in many types, each designed for specific tasks, pliers are a staple in any toolkit.
1. What Are Pliers?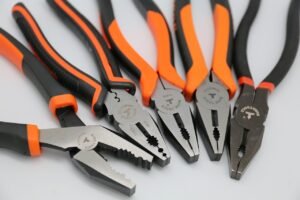
Pliers are hand-operated tools consisting of a pair of metal levers connected at a pivot point, which enables users to apply force and control through squeezing the handles. This design allows them to perform tasks such as gripping, bending, twisting, or cutting various materials, from wire and nails to bolts and small components.
2. Types of Pliers and Their Uses
Each type of plier is crafted to handle specific tasks, offering unique designs and functions. Here are some of the most popular types:
Slip-Joint Pliers: These have an adjustable pivot point, allowing the jaws to widen or narrow for gripping materials of different sizes. They’re general-purpose tools, commonly used for holding, bending, and turning items.
Needle-Nose Pliers: Featuring long, slender jaws that can reach tight spaces, needle-nose pliers are ideal for precision work in electronics, jewelry-making, and detailed repair tasks. The narrow tips allow for bending and manipulating small wires and components.
Linesman Pliers: Often used in electrical work, linesman pliers have a wide, flat gripping area and cutting edge, which make them ideal for twisting wires and cutting cables. They’re also robust, allowing them to handle thicker wires and offer a firm grip.
Diagonal Cutting Pliers: Also known as wire cutters, these pliers have sharp, angled jaws for cutting through wires, nails, and other thin materials. They don’t have gripping jaws, making them specialized for clean cuts rather than gripping or twisting.
Locking Pliers: These pliers can lock into place, acting as a clamp. Often called “Vise-Grips,” locking pliers are used when a secure, hands-free grip is needed. They can hold bolts or pipes tightly, making them useful in automotive and plumbing applications.
Channel Lock (Tongue-and-Groove) Pliers: With a sliding pivot point and long handles, these pliers offer a wide jaw opening, making them suitable for plumbing and gripping larger items like pipes and bolts.
Bent-Nose Pliers: Similar to needle-nose pliers but with angled jaws, bent-nose pliers are useful for working in hard-to-reach areas or manipulating small objects at unusual angles.
Round-Nose Pliers: With rounded jaws, these pliers are used in crafting and jewelry-making to create loops and curves, making them ideal for working with soft materials like wires and metals.
3. Key Features of Quality Pliers
Choosing quality pliers ensures durability, comfort, and precise performance. Here are some essential features:
Ergonomic Handle: Comfortable, non-slip grips make handling easier, especially for tasks requiring prolonged use. Insulated handles are especially beneficial for electrical work to prevent electric shocks.
Strong Material: Look for pliers made from durable materials like chrome-vanadium steel or hardened alloy steel. High-quality materials extend the tool’s life and enhance performance.
Sharp Cutting Edges: For pliers with cutting functions, the cutting edges should be sharp and able to withstand frequent use without dulling.
Adjustable Jaw Width: For slip-joint and tongue-and-groove pliers, an adjustable jaw width increases the tool’s versatility and makes it easier to handle a variety of tasks.
4. Choosing the Right Pliers for the Job
The right pliers make a difference in the ease and quality of a task. Here are some tips for choosing the right pair:
Match the Pliers to the Task: Choose linesman pliers for electrical work, diagonal cutters for cutting wire, and needle-nose pliers for detailed tasks requiring precision.
Consider Size and Strength: Smaller pliers work better for delicate tasks, while larger, more robust pliers are best for heavy-duty applications like plumbing and automotive work.
Grip Comfort and Control: Ergonomically designed handles reduce strain during prolonged use and improve grip, minimizing hand fatigue.
5. Using Pliers Safely
Improper use of pliers can lead to hand injuries or tool damage. Follow these safety guidelines for safe and effective use:
Use Pliers for Their Intended Purpose: Using cutting pliers for gripping tasks or vice versa can damage both the tool and the workpiece.
Wear Protective Gear: When working with sharp edges or cutting through materials, wear gloves to protect your hands from potential injury.
Inspect the Tool: Ensure the cutting edges are sharp and the pivot point functions smoothly. Dull blades or a sticky pivot can make the tool harder to use and less effective.
Avoid Excessive Force: Applying too much force can damage the pliers or cause them to slip, potentially leading to accidents.
Cable Cutters
Cable Cutters are specialized tools designed to cut through various types of cables and wires cleanly and safely. Unlike regular cutting tools, cable cutters are engineered to handle the unique challenges of cutting electrical, coaxial, or even steel-reinforced cables. This tool is essential for professionals in electrical, telecommunications, and construction fields, as well as for DIY enthusiasts tackling home wiring or electronics projects.
1. What Are Cable Cutters?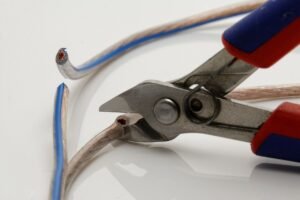
Cable cutters are hand tools with sharp, often curved blades that enable clean, precise cuts on different cable types without fraying or flattening. These tools are designed to handle various cable thicknesses and materials, from simple electrical wires to thicker, armored cables. Their cutting mechanism is optimized to reduce the physical effort required, giving users control and accuracy.
2. Types of Cable Cutters
Standard Cable Cutters: These are general-purpose cutters designed to cut through standard electrical cables, such as copper or aluminum wires, used in household and commercial wiring. They are commonly used by electricians for tasks like preparing wires for connections.
Ratchet Cable Cutters: Ratchet cable cutters use a ratcheting mechanism to gradually increase pressure, allowing users to cut through thick cables with minimal effort. This type is ideal for handling larger cables, including those used in industrial settings, and is designed to make smooth cuts without leaving rough edges.
Coaxial Cable Cutters: Designed specifically for coaxial cables, these cutters help make clean cuts without damaging the cable’s inner conductor or shielding. They are often used in telecommunications, cable installations, and home theater setups.
Armored Cable Cutters: These heavy-duty cutters are used to cut through cables reinforced with steel or other tough materials. Armored cable cutters have extra-strong blades and handles to provide the necessary force for cutting through rigid, protective cable layers.
Battery-Powered Cable Cutters: Ideal for high-volume or repetitive work, battery-powered cable cutters are automated, enabling quick and precise cuts with minimal effort. These are often used in industrial environments where speed and efficiency are essential.
3. Key Features of Quality Cable Cutters
Sharp, Durable Blades: High-quality cable cutters have hardened steel blades that retain their sharpness over time and resist dulling. This is crucial for making clean, smooth cuts without damaging the internal structure of the cable.
Curved Cutting Blades: Many cable cutters feature curved blades designed to encircle the cable, which results in a cleaner, less deformed cut.
Ergonomic Handle: Look for cable cutters with comfortable, non-slip handles that reduce hand fatigue. Ergonomic handles help provide control, especially when cutting through thicker or more challenging materials.
Ratchet Mechanism: For ratchet cutters, a high-quality ratcheting system ensures easy and smooth cutting of large cables with minimal physical effort.
Safety Lock: Many cable cutters come with a locking mechanism to keep the blades closed when not in use, enhancing safety and protecting the tool from wear.
4. Choosing the Right Cable Cutter for the Job
Selecting the right cable cutter is essential to ensure clean cuts, prolong the life of the tool, and improve overall safety. Here are some considerations:
Match the Cutter to the Cable Type: Different cables have specific cutting requirements. For instance, coaxial cable cutters are ideal for telecommunications, while heavy-duty ratchet cutters suit large power cables.
Consider the Cable Thickness: Cable cutters come in different sizes and cutting capacities. Ensure the tool you choose can handle the maximum diameter of cable you’ll be working with.
Frequency of Use: For occasional, light use, a standard cable cutter may suffice. However, for high-frequency cutting or industrial settings, a ratchet or battery-powered cutter will save time and effort.
5. Using Cable Cutters Safely
To avoid injury and ensure the longevity of your cable cutters, follow these safety guidelines:
Wear Protective Gear: Use gloves to protect your hands from sharp cable edges, and wear safety glasses to prevent eye injuries from stray wire fragments.
Use Proper Technique: Make sure the cable is securely positioned between the blades. Squeeze firmly and evenly for a clean cut—never use excessive force.
Inspect Cables for Live Current: If working with electrical wiring, ensure the power is turned off to avoid electric shock.
Maintain the Tool: Keep the blades clean and dry to prevent rust, and sharpen or replace the blades when necessary to ensure optimal performance.
Crimping Tool
Crimping Tools are specialized hand tools used to create secure connections between wires and terminals by compressing or “crimping” metal components together. Essential for electrical, networking, automotive, and telecommunications work, crimping tools ensure a strong, reliable, and conductive connection that minimizes the risk of loose wires, short circuits, and connection failures. They are commonly used to connect wires to connectors, terminals, and splices, making them invaluable for wiring projects.
1. What Is a Crimping Tool?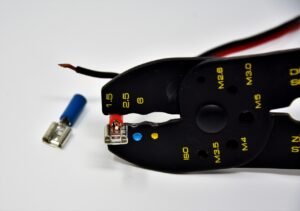
A crimping tool is designed to deform a metal sleeve or terminal, compressing it onto the wire and creating a secure connection. Crimped connections are widely used because they’re faster to make than soldered connections, don’t require heat, and provide excellent electrical conductivity. A good crimp ensures a solid mechanical and electrical bond between the wire and terminal.
2. Types of Crimping Tools
Crimping tools come in various types, each suited for different tasks and wire types. Here are some of the most common types:
Manual Crimping Tool: The most basic type, operated by squeezing the handles to crimp the terminal. They’re suitable for small to medium wire sizes and are commonly used for DIY projects or occasional electrical work.
Ratchet Crimping Tool: A ratchet mechanism allows controlled pressure, ensuring a consistent crimp every time. The tool only releases once the crimping process is complete, ensuring a high-quality crimp. These are widely used for precise and repetitive tasks, as the ratchet mechanism reduces hand fatigue.
Hydraulic Crimping Tool: These use hydraulic pressure to crimp larger cables and terminals, often found in heavy-duty applications, such as industrial and automotive work. Hydraulic crimpers offer high crimping force with minimal effort and can handle large, thick cables that manual tools cannot.
Battery-Powered Crimping Tool: These are ideal for high-volume crimping in industrial or construction settings. Battery-powered crimpers offer speed and convenience, especially for repetitive tasks, and eliminate the need for manual force.
Insulated Terminal Crimping Tool: Designed specifically for insulated terminals, these crimpers protect the terminal’s insulation while creating a secure connection. They are commonly used in automotive and electrical wiring where insulated connections are required.
3. Key Features of Quality Crimping Tools
High-quality crimping tools ensure secure, reliable connections and are built to withstand frequent use. Here are essential features to look for:
Precision Dies: Crimping tools come with dies (the jaws that create the crimp) sized to match different wire gauges and terminal types. High-quality tools have precisely machined dies that create consistent crimps without damaging the wire or terminal.
Adjustable Crimping Force: Some crimping tools allow for adjusting the crimping pressure, which is helpful when working with different wire sizes or terminal materials. This ensures a firm crimp without over-compressing.
Ergonomic Handle: A comfortable, non-slip grip reduces hand fatigue, which is especially important for high-volume tasks. Ratchet and hydraulic crimpers are particularly ergonomic for repetitive use.
Built-in Ratchet Mechanism: In ratchet crimpers, this feature guarantees consistent pressure on the terminal, resulting in a quality crimp every time.
Interchangeable Dies: Some crimping tools have removable dies, allowing users to switch to different sizes or shapes. This feature is convenient for those who work with a wide range of connectors and terminal types.
4. Choosing the Right Crimping Tool for the Job
Selecting the right crimping tool depends on the wire type, terminal type, and the specific job requirements. Here are some factors to consider:
Wire Size and Terminal Type: Ensure the crimping tool is compatible with the wire gauge and terminal type you’re using. Many crimping tools have markings on the dies to indicate the appropriate sizes.
Frequency of Use: For occasional use, a manual crimping tool may suffice. For repetitive or large-scale tasks, a ratchet or battery-powered crimper saves time and reduces effort.
Type of Application: For automotive or industrial settings, a hydraulic crimper may be necessary to handle thicker cables. For telecommunications and network cables, consider tools specifically designed for modular connectors (e.g., RJ45 or RJ11).
5. Using Crimping Tools Safely
Crimping tools are generally safe to use, but proper handling ensures the best results and avoids potential issues. Here are some safety tips:
Choose the Correct Die Size: Selecting the right die size for the wire gauge and terminal ensures a strong crimp without damaging the components.
Position the Terminal Properly: Place the terminal correctly within the die to prevent misalignment, which can cause weak connections.
Use Proper Hand Pressure: For manual crimpers, apply steady pressure without over-squeezing, which can cause fatigue or deform the terminal.
Inspect the Crimp: After crimping, visually inspect and tug on the connection to ensure it’s secure and that there are no visible gaps or loose ends.
Voltage Tester
Voltage Testers are essential tools for anyone working with electrical systems, from professional electricians to DIY homeowners. They provide a quick, safe, and reliable way to detect the presence or absence of voltage in electrical circuits, outlets, and wiring, helping to prevent accidental shocks and ensuring circuits are safe before starting any electrical work. Voltage testers come in several types, each suited to specific applications, offering unique features and levels of precision.
1. What Is a Voltage Tester?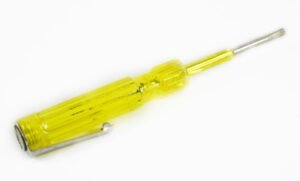
A voltage tester is a handheld device used to detect live electrical circuits. It works by sensing the presence of electrical current in a wire, socket, or other electrical component. Depending on the type, a voltage tester can indicate whether voltage is present, measure voltage levels, and, in some advanced models, identify if a circuit is grounded or polarized.
2. Types of Voltage Testers
Non-Contact Voltage Testers (NCVTs): These testers are the most common and user-friendly type. They detect voltage without direct contact by sensing the electric field around a live wire. They’re widely used for basic electrical checks, such as confirming if an outlet, switch, or wire is live. They’re also safer since they require no physical contact with conductive surfaces.
Contact Voltage Testers: These testers require direct contact with the circuit or wire to measure voltage. They’re often used for more detailed inspections in outlets, light fixtures, or switch boxes. Contact voltage testers are more precise than non-contact models, providing exact voltage measurements.
Multifunction Testers: These advanced tools can detect and measure AC/DC voltage, continuity, resistance, and sometimes current. Multifunction testers are often used by professionals who need detailed information on electrical systems, providing comprehensive data in one tool.
Neon Voltage Testers: These testers have two metal probes and a small neon light that glows when voltage is detected. They are straightforward and effective, often used for simple tasks like checking if an outlet or circuit is live. Neon testers usually have a limited voltage range, typically for household electrical systems.
Multimeter with Voltage Testing Capabilities: Multimeters can measure AC and DC voltage, resistance, and current. They’re suitable for more detailed diagnostics, offering precise voltage readings and additional functionality for electrical troubleshooting.
3. Key Features of Quality Voltage Testers
To ensure reliability and safety, look for these features when choosing a voltage tester:
Voltage Range: Depending on the tasks, choose a tester with a suitable voltage range. Some testers cover both low and high voltage ranges, useful for various applications from household wiring to industrial systems.
Safety Ratings: Voltage testers often come with safety ratings (CAT ratings) that indicate safe usage levels. For household use, a CAT II rating suffices, while industrial settings often require CAT III or CAT IV ratings.
Clear Indicators: Look for testers with easy-to-read LED indicators, sound alerts, or display screens. Non-contact testers typically emit an audible sound or light up when voltage is detected.
Durability and Build Quality: A sturdy, well-insulated body with ergonomic grips improves durability and handling. Voltage testers with dust- and water-resistant ratings are especially useful for outdoor or rougher work environments.
Auto-Off Function: Many testers have an auto-off function to conserve battery life, which is particularly useful for those who work frequently with voltage testers.
Additional Functions: Multifunction testers or models with extra features (e.g., flashlight, polarity detection, self-test) provide greater versatility and convenience.
4. Choosing the Right Voltage Tester for the Job
The right voltage tester depends on the scope and environment of the work:
For Basic Household Use: A non-contact voltage tester is sufficient for simple tasks like checking outlets and switches. These models are convenient, safe, and easy to use.
For Professional Electricians: Multifunction testers or multimeters provide more detailed readings, which are essential for troubleshooting and diagnosing electrical issues in homes or industrial setups.
For Industrial or High-Voltage Work: Choose testers with a high CAT rating for added safety, such as CAT III or CAT IV-rated tools, which protect against higher voltage spikes and are designed for commercial and industrial environments.
5. Using Voltage Testers Safely
Voltage testers are generally safe, but following safety practices is crucial for effective use and avoiding risks:
Always Test on a Known Live Source: Before and after use, test the device on a known live source to verify it’s working correctly.
Wear Insulated Gloves: While voltage testers are designed for safety, insulated gloves offer additional protection against accidental shocks.
Use Only on De-energized Circuits (If Required): Certain testers, such as neon testers and contact voltage testers, require careful handling and may be unsafe on energized circuits unless they are explicitly designed for such use.
Keep the Tool Dry and Clean: Moisture can interfere with readings or damage the tester, so store it in a dry, clean place and inspect it regularly.
Follow Manufacturer’s Instructions: Always read and adhere to the user manual to ensure safe operation and maximize the accuracy of your voltage tester.
Fish Tape
Fish Tape is a tool used by electricians and DIY enthusiasts to route wiring through walls, conduits, or other confined spaces. The tool is a long, narrow strip of steel, fiberglass, or nylon wound onto a reel, with a small loop or hook on one end. Fish tape is crucial for navigating hard-to-reach areas, allowing users to pull or “fish” wiring across distances that are otherwise difficult to access, making it invaluable for wiring installations, repairs, and other electrical work.
1. What Is Fish Tape?
Fish tape is a flexible tool that functions as a guide for pulling cables through walls, electrical conduits, and tight spaces. It’s commonly used when installing new wiring in buildings, where routing wire through walls and floors can be challenging. Fish tape provides a way to feed a line through an area, then pull the wiring back through using that line, reducing the need for wall or ceiling alterations and enabling efficient wire placement.
2. Types of Fish Tape
Steel Fish Tape: Made from durable steel, this type of fish tape is highly resilient and rigid, making it suitable for longer, straighter runs in conduits. Steel fish tape is preferred for heavy-duty use, though it can be harder to navigate around tight bends.
Fiberglass Fish Tape: Fiberglass tape is lighter and more flexible than steel, allowing it to bend around tight corners more easily. It’s non-conductive, making it safer for electrical work near live circuits, and is ideal for shorter or more complex runs where maneuverability is important.
Nylon Fish Tape: Made from durable nylon, this fish tape combines the flexibility of fiberglass with added strength. It’s also non-conductive, which makes it safe for use around electricity. However, it’s best suited for smaller-scale tasks as it’s not as strong as steel for longer pulls.
Glow-in-the-Dark Fish Tape: Designed to improve visibility in dark spaces like wall cavities or crawl spaces, glow-in-the-dark fish tape often comes in fiberglass or nylon. This feature is especially helpful when working in low-light or restricted-visibility environments.
Conductive Fish Tape: Some fish tapes come with conductive materials, allowing electricians to use them with a tone generator to help locate tape inside walls or conduits. These are used mainly in telecommunications and low-voltage applications.
3. Key Features of Quality Fish Tape
Material and Durability: The choice of material affects durability and flexibility. Steel is strong and durable, while fiberglass and nylon are lightweight, non-conductive, and more flexible.
Ease of Use and Flexibility: High-quality fish tapes offer good flexibility for maneuvering through obstacles, while still being strong enough to avoid breaking or snapping.
Reel Mechanism: A smooth-operating reel reduces hand fatigue and allows easy feeding and retracting. Look for a reel that’s durable and doesn’t bind or jam frequently.
Length and Strength: Fish tapes come in various lengths, typically from 25 to 240 feet. Choose a length that suits the typical runs you’ll be working on, balancing reach with ease of handling.
Non-Conductive Material: For safety, consider non-conductive fish tapes (fiberglass or nylon) when working around live circuits or for use in delicate electronics.
4. How to Use Fish Tape Effectively
Fish tape can simplify wiring work significantly, but proper handling and technique are crucial:
Feed the Fish Tape: Insert the end of the fish tape into the conduit or wall opening, slowly feeding it through until it reaches the desired exit point. For longer runs, it helps to straighten the tape before inserting to reduce resistance.
Attach the Wire: Once the tape reaches the destination, secure the wire to the loop or hook on the end of the fish tape. Electrical tape can be used to attach the wire firmly and prevent it from slipping.
Pull the Fish Tape Back: Carefully pull the tape back through the wall or conduit, bringing the wire along with it. Avoid pulling too fast or applying excessive force, as this could damage the tape, wire, or conduit.
Release the Wire: Once the wire has been pulled through, detach it from the tape and make any necessary adjustments to the placement or connections.
5. Tips for Using Fish Tape Safely
Use Non-Conductive Tape for Electrical Work: For tasks near live circuits, choose fiberglass or nylon tape to reduce the risk of electric shock. Steel fish tape should be reserved for conduits that are not live.
Avoid Excessive Bending: Excessive bending can cause fish tape to kink or snap, especially with steel tape. If you encounter a sharp bend, try feeding from the opposite end or use a more flexible fish tape.
Secure the Wire Properly: Tightly securing the wire to the fish tape helps prevent snags during pulling. Wrapping the connection with tape also makes the end smoother, reducing the chances of catching on obstructions.
Retract Carefully: To prevent damage to the reel or the tape, retract slowly and smoothly. Pulling or jerking can damage both the tool and the wiring.
Inspect for Damage: Regularly check your fish tape for kinks, bends, or frays that could lead to breakage or difficulty in feeding.
Tape Measure
Tape Measures are essential hand tools used across various fields, from construction and carpentry to DIY projects. They provide quick and accurate measurements of distances, dimensions, and objects, making them invaluable for precise planning and execution. Tape measures come in various lengths, materials, and designs, with features suited to different applications, whether it’s measuring a wall length, marking out for installations, or verifying dimensions.
1. What Is a Tape Measure?
A tape measure is a flexible ruler, typically made of metal, fiberglass, or plastic, coiled into a compact case for easy storage. It features marked measurements in inches, feet, centimeters, and millimeters, allowing users to take measurements for tasks requiring precision and efficiency. Most tape measures have a spring mechanism that retracts the tape into the case, while the end of the tape has a metal hook that helps anchor it to surfaces for accurate measurements.
2. Types of Tape Measures
Pocket Tape Measures: The most common type, these tape measures are compact and typically range from 6 to 35 feet. Pocket tape measures are ideal for most general tasks and come with a sturdy, retractable metal blade marked with both imperial (inches/feet) and metric units.
Long Tape Measures: These range from 50 to 300 feet and are often used for outdoor or large-scale measurements, such as land surveying, construction projects, and athletic field marking. They are typically made from durable fiberglass to prevent stretching and are either housed in an open reel or a crank-operated casing for manual retraction.
Digital Tape Measures: Digital tape measures incorporate laser technology for quick, accurate measurements. They are useful in situations where it’s difficult to use a traditional tape measure, like high or distant spots. Most digital tape measures display measurements on a digital screen and offer additional functions like area calculation and memory storage.
Surveyor’s Tape: Surveyor’s tape, or “measuring tape,” is often used for land measurement and comes in very long lengths (up to 500 feet or more). It is typically made from fiberglass to avoid stretching or distortion over long distances.
3. Key Features of Quality Tape Measures
Clear, High-Contrast Markings: For quick and easy reading, tape measures should have clear, bold markings that stand out against the tape’s background. Look for high-contrast marks in both imperial and metric units, especially if you need to work across different measurement systems.
Blade Material: The material affects durability and flexibility. Metal blades are strong and retract quickly but can bend or kink, while fiberglass blades are flexible, resistant to stretching, and suitable for outdoor or long-distance measurements.
Hook Design: A quality tape measure has a metal hook at the end that’s slightly loose to accommodate both inside and outside measurements. Some hooks come magnetized or with a rubber grip, enhancing their hold on metallic surfaces.
Lock Mechanism: The lock button holds the blade in place, preventing it from retracting during use. A strong lock ensures stability, allowing users to mark or transfer measurements more accurately.
Recoil or Retract Mechanism: A good recoil mechanism helps the tape retract smoothly and without jamming. Tape measures with “slow return” features are also beneficial for safer handling.
Standout Length: Standout refers to how far the tape can extend horizontally before bending or collapsing. Longer standouts (7–12 feet) are helpful for measuring over obstacles or across larger areas without needing a second person to hold the tape.
Durability and Protective Coating: Many tape measures come with a protective nylon or Mylar coating on the blade, which resists wear, rust, and damage from moisture. For construction work, look for shockproof cases and heavy-duty blades that withstand rugged use.
4. How to Use a Tape Measure Effectively
Anchor the Hook: Hook the tape’s end onto an edge or secure it to a surface. This keeps the tape stable, allowing you to pull it out smoothly for accurate measurements.
Use the Locking Mechanism: For longer measurements, use the lock button to hold the blade in place once you reach the desired length. This lets you focus on marking or recording the measurement.
Reading the Markings: Be familiar with the units and markings on your tape. Standard U.S. tapes are marked in inches and feet, often with fraction markings. Metric tapes show centimeters and millimeters. Some tapes display both units side by side for convenience.
Make Use of the Hook Play: The small amount of movement in the hook (the “hook play”) allows for both inside and outside measurements. The hook slides slightly to ensure accuracy whether you’re measuring from the end of the tape or against the surface.
Measure Horizontally for Better Accuracy: For precise measurements, hold the tape as horizontally and taut as possible. For vertical measurements, stabilize the tape to prevent it from bending or swaying, which can skew readings.
5. Choosing the Right Tape Measure for the Job
Selecting the right tape measure is essential for efficient and accurate work:
For Everyday Tasks: A standard 25-foot pocket tape measure with a strong lock and standout will suffice for most household and small construction projects.
For Large-Scale Projects: Choose a long tape measure (50 feet or more) with a fiberglass blade for construction, landscaping, or surveying. If you frequently work outdoors, consider a reel tape measure with a crank handle for easy retraction.
For Precision Measurements: A digital or laser tape measure provides fast and highly accurate measurements. They’re ideal for real estate, interior design, and projects requiring exact specifications.
6. Tips for Using Tape Measures Safely
Watch Out for Recoil: When retracting the tape, guide it back into the case slowly to avoid the blade whipping back, which can cause injury or damage the tape.
Keep the Blade Straight: Avoid excessive bending or kinking, especially on metal blades, as this can weaken the tape and lead to inaccurate measurements.
Check for Wear: Regularly inspect the hook and blade for signs of wear. A worn or damaged hook can lead to inaccurate readings, while a rusty or kinked blade may get stuck or break.
Store Properly: Store the tape measure in a cool, dry place to prevent rust or wear. Keep it retracted when not in use to reduce exposure to the elements.
Utility Knife
Utility Knives are versatile, essential tools in a wide range of settings, from construction sites and warehouses to workshops and household toolkits. Known for their compact design and sharp blades, utility knives are ideal for cutting through various materials, including cardboard, plastic, drywall, carpet, and more. They provide precision and control, making them invaluable for tasks that require clean, precise cuts.
1. What Is a Utility Knife?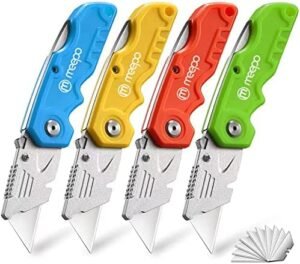
A utility knife is a handheld tool with a replaceable blade that retracts into the handle for safety and convenience. It’s designed for cutting lightweight materials and is used across many industries due to its effectiveness and ease of handling. Utility knives come in several types, with features that cater to different tasks, such as adjustable blade lengths, ergonomic grips, and various blade types.
2. Types of Utility Knives
Retractable Utility Knives: The blade on these knives retracts into the handle when not in use, enhancing safety. They typically feature a sliding button or lever to extend and retract the blade, allowing users to adjust the blade length based on the material they’re cutting.
Fixed Blade Utility Knives: With a permanently extended blade, these knives are ideal for heavy-duty cutting tasks, as they are sturdier and can withstand more force. Although they lack the safety of retractable models, they are preferred for demanding tasks where stability is essential.
Folding Utility Knives: Similar to pocket knives, folding utility knives fold into a compact shape when not in use. They’re portable, easy to store, and generally safer due to the folding mechanism. Folding knives are popular among tradespeople and DIYers for their portability and convenience.
Snap-Off Blade Knives: These knives have segmented blades that can be snapped off as they dull, providing a fresh cutting edge without replacing the entire blade. Snap-off knives are ideal for tasks requiring continuous sharpness, such as cutting wallpaper or fabric.
Heavy-Duty Utility Knives: Built with thicker blades and reinforced handles, heavy-duty knives are designed for cutting tougher materials like carpeting, roofing, and thick plastic. They often feature ergonomic grips to enhance control and comfort during extended use.
3. Key Features of Quality Utility Knives
Blade Material: High-quality blades are usually made from hardened steel or stainless steel, ensuring sharpness and durability. For specialized tasks, some knives use coated or serrated blades to enhance performance.
Ergonomic Design: Many utility knives come with ergonomic handles to improve comfort and reduce hand fatigue during prolonged use. Features like rubber grips or contoured shapes also provide better control.
Blade Locking Mechanism: A reliable locking mechanism ensures that the blade stays in place while in use. Look for models with secure locks, especially for retractable and snap-off blade knives, to prevent accidental blade retraction or extension.
Easy Blade Replacement: Most utility knives have mechanisms for quick blade replacement, allowing users to change out dull blades without the need for tools. Some models even store extra blades in the handle for convenience.
Durability and Build Quality: Heavy-duty utility knives are built with metal or reinforced plastic housings to withstand wear and impact, making them suitable for rough environments and challenging tasks.
4. How to Use a Utility Knife Safely and Effectively
Select the Right Blade Length: For retractable and snap-off knives, adjust the blade length to match the material thickness. Only extend as much blade as needed for the cut to ensure stability and prevent bending or snapping.
Stabilize the Material: Hold or secure the material you’re cutting to avoid slippage. If possible, cut on a stable surface to prevent accidents and ensure accuracy.
Angle the Blade Properly: Holding the blade at a slight angle improves control and reduces resistance, making it easier to cut through material smoothly and accurately.
Apply Controlled Pressure: Let the blade do the cutting—avoid forcing the knife through the material, as this can lead to slips or breakage. Instead, use steady, controlled pressure for clean cuts.
Use a Cutting Mat or Surface: When cutting materials like fabric, paper, or thin plastic, use a cutting mat or other safe cutting surface to protect both the blade and the surface below.
Keep Hands Clear of the Blade Path: Always keep your other hand or fingers away from the cutting path. It’s easy to lose control if a blade catches on tough material, so position yourself for maximum safety.
5. Choosing the Right Utility Knife for the Job
Selecting the right utility knife depends on the nature and frequency of your tasks:
For Everyday Light-Duty Use: A retractable or folding utility knife is versatile and safe for household tasks like opening boxes, cutting paper, and slicing through packaging.
For Heavy-Duty or Industrial Use: Opt for a fixed-blade or heavy-duty utility knife with a sturdy handle and reinforced blade. These are better suited for tougher materials like carpet, thick plastic, or wood.
For Precision Work: Snap-off blade knives or smaller utility knives with adjustable blade lengths are ideal for tasks requiring high precision, such as cutting wallpaper, foam, or vinyl.
For Frequent Travel or Storage in Tool Bags: A folding utility knife provides easy storage, portability, and compactness, making it ideal for tradespeople or DIYers on the go.
6. Utility Knife Safety Tips
Always Retract or Cover the Blade: When not in use, always retract the blade or fold the knife. This reduces the risk of accidental cuts, especially when carrying the knife in a pocket or tool bag.
Inspect the Blade Before Use: Dull or damaged blades are more likely to slip and cause accidents. Replace any blade that shows signs of wear, such as chipping, dullness, or warping.
Wear Protective Gear: Gloves with a non-slip surface provide added grip and protection when working with utility knives, especially for heavy-duty or repetitive cuts.
Dispose of Blades Properly: Used blades should be stored safely until they can be disposed of in a sharps container to avoid injury.
Keep Out of Reach of Children: Due to their sharp blades, utility knives should be kept in a safe place, out of reach of children and in a secured toolbox if possible.
Conduit Bender
Conduit Benders are specialized tools used by electricians to bend electrical conduit — the tubing that protects and routes electrical wiring in buildings. By bending conduit to precise angles, electricians can create clean, organized installations while ensuring that conduit follows walls, floors, and ceilings without obstruction. Conduit benders are essential for shaping conduit to fit specific layouts, avoid obstacles, and maintain a professional and safe wiring system.
1. What Is a Conduit Bender? 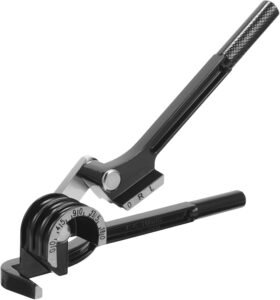
A conduit bender is a manual or powered tool that helps shape conduit tubing to specific angles, such as 90° (right angle) or offset bends. It’s designed to accommodate the diameter and type of conduit being used, whether that’s electrical metallic tubing (EMT), rigid metal conduit (RMC), or other types. Conduit benders typically have markings or guides on the head to indicate common bending angles and measurement references.
2. Types of Conduit Benders
Hand Benders: The most common type, hand benders are operated manually and feature a long handle for leverage. They’re ideal for bending smaller conduits, like EMT, up to about 1 inch in diameter. Hand benders have angle markers and guides on the bender head for precision bending, and they’re widely used on smaller residential and commercial electrical projects.
Mechanical Benders: Mechanical conduit benders are used for bending thicker, more rigid conduit types, such as RMC or intermediate metal conduit (IMC). They often feature ratcheting mechanisms or hydraulic assistance to increase force, making it easier to bend heavier materials.
Electric or Hydraulic Benders: These are advanced, powered conduit benders used for large-scale commercial and industrial applications. They’re capable of bending thicker conduit quickly and precisely, saving time and effort on high-volume projects.
Portable Benders: Lightweight and portable, these benders are designed for fieldwork where portability is a priority. They’re usually compact and allow electricians to make precise bends on smaller conduit types without needing a large setup.
3. Key Features of Quality Conduit Benders
Markings and Degree Indicators: Quality conduit benders have clear, easy-to-read markings on the bender head for common angles, such as 10°, 22.5°, 30°, 45°, and 90°. These guides ensure that electricians can bend the conduit accurately without needing to measure each time.
Sturdy Construction: Conduit benders are often made from aluminum or cast iron. Aluminum benders are lightweight and easier to carry, while cast iron benders offer durability for bending thicker or harder conduit types.
Comfortable Handle: Hand conduit benders usually have a long handle with a comfortable grip for added leverage. A good grip reduces fatigue and provides stability, making the bending process smoother and safer.
Foot Pedal or Rest: Many hand benders include a foot pedal or rest for additional stability. This allows the electrician to apply extra force while keeping the conduit steady, helping create consistent bends without slipping.
Angle Bending Chart: Some benders include a chart on the handle or head to guide users on measurements for common bends, reducing calculation time and improving consistency.
4. How to Use a Conduit Bender for Accurate Bends
Mark the Conduit: Start by marking the conduit at the point where you need the bend. Measure and plan ahead, as precise marks will ensure your bend aligns with the layout.
Align the Bender: Place the conduit into the bender head, aligning the marked spot with the correct angle guide on the bender. Ensure that the conduit is seated securely and that you’re using the correct marking (like “arrow” or “star” on the bender) based on the type of bend you need.
Apply Pressure with Controlled Force: For hand benders, apply steady pressure by pressing down on the handle while keeping your foot steady on the conduit or foot pedal. Bend until the conduit reaches the desired angle, taking care not to overbend.
Check the Angle: After bending, use a protractor or angle finder to check that the angle is accurate. This is particularly important for precise installations, where small inaccuracies can lead to misalignment.
Adjust as Needed: If the bend is slightly off, make small adjustments using the bender, but avoid over-bending as this can weaken the conduit.
5. Common Bending Techniques
90-Degree Bends: Known as “right angle bends,” these are the most common bends used for corners and directional changes. They require precise placement to avoid excess strain on the wiring inside.
Offset Bends: Used to navigate around obstacles, such as beams or pipes, offset bends create a “step” in the conduit. They typically require two equal bends, usually at 10° to 45° angles, to clear the obstacle and return to the original alignment.
Saddle Bends: Saddle bends allow the conduit to pass over smaller obstacles, like other conduits or cables. These bends typically involve three bends — two small and one larger bend in between — to create the desired “saddle” shape.
Back-to-Back Bends: These are two bends that mirror each other, often used when creating a U-shape in the conduit. They’re useful for routing conduit around obstacles or maintaining a clean installation in confined spaces.
6. Choosing the Right Conduit Bender for the Job
Selecting the right conduit bender is essential for efficiency and precision:
For Light-Duty Jobs: A hand conduit bender is ideal for smaller conduit sizes, like EMT up to 1 inch. Look for a model with clear markings, a comfortable grip, and durable construction for daily tasks.
For Heavy-Duty or High-Volume Projects: For larger conduits or tougher materials like IMC or RMC, a mechanical or powered bender is best. Electric or hydraulic benders will save time and reduce physical strain for large-scale jobs.
For Field Work: Choose a lightweight, portable bender if you frequently work in remote or varied locations. Some compact models are designed specifically for portability and convenience.
7. Tips for Using Conduit Benders Safely and Effectively
Wear Safety Gear: Safety glasses and gloves are recommended when using conduit benders to protect against accidental injuries.
Check Conduit Compatibility: Ensure that your bender is rated for the specific type and diameter of conduit you’re using. Using a bender that’s too small or weak can lead to breakage and imprecise bends.
Secure the Conduit Firmly: Before bending, make sure the conduit is fully seated in the bender head. Loose placement can result in inaccurate bends or slipping, which can damage both the tool and the conduit.
Avoid Over-Bending: Applying excessive force can cause the conduit to crack, kink, or weaken, reducing its durability and effectiveness. It’s better to make gradual adjustments than to force a bend beyond its limit.
Store Properly: After use, clean your conduit bender and store it in a dry, cool place. This helps prevent rust and wear, especially on metal components.
Flashlight/Headlamp
Flashlights and Headlamps are indispensable tools for a wide variety of tasks, providing essential illumination in dark or low-light environments. Whether you’re working on a construction site, camping in the wilderness, or simply looking for something in a dimly lit space, having the right lighting can make all the difference. These portable light sources come in various styles, sizes, and power options, catering to different needs and preferences.
1. What Are Flashlights and Headlamps?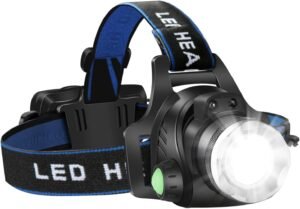
Flashlights are handheld portable devices that emit light, typically powered by batteries. They consist of a light bulb, a reflector, and a lens, all housed in a durable casing. Flashlights vary in size, brightness (measured in lumens), and beam distance, making them suitable for various applications, from emergency situations to everyday use.
Headlamps are similar to flashlights but are worn on the head, allowing for hands-free operation. They feature adjustable straps to secure them to the head, and the light source is mounted on the front. Headlamps are particularly useful in situations where both hands are needed, such as when hiking, climbing, or performing repairs.
2. Types of Flashlights
Standard Flashlights: These are traditional flashlights available in various sizes, from compact pocket-sized models to larger, heavy-duty variants. They often feature different brightness settings, allowing users to adjust the light output based on the task.
Tactical Flashlights: Designed for law enforcement and military use, tactical flashlights are robust, often made from aluminum or other durable materials. They typically offer high lumens, multiple brightness settings, and features like strobe modes for self-defense or signaling.
LED Flashlights: LED (Light Emitting Diode) flashlights are energy-efficient, long-lasting, and produce bright light with minimal heat. They are the most popular type of flashlight today, available in various sizes and configurations.
Rechargeable Flashlights: These flashlights have built-in batteries that can be recharged via USB or other methods. They eliminate the need for disposable batteries, making them more environmentally friendly and cost-effective over time.
Lanterns: While not traditional flashlights, lanterns are portable light sources that provide 360 degrees of illumination. They’re ideal for camping, power outages, and outdoor gatherings.
3. Types of Headlamps
Standard Headlamps: Basic models often include a single LED bulb, adjustable brightness levels, and a simple elastic strap. These are great for general use, such as reading or household tasks.
Multi-LED Headlamps: These headlamps feature multiple LED bulbs that can produce different beam patterns and brightness settings, allowing users to switch between focused and floodlight modes.
Rechargeable Headlamps: Similar to rechargeable flashlights, these headlamps come with built-in rechargeable batteries. They are convenient for long-term use and often include USB charging options.
Specialized Headlamps: Some headlamps are designed for specific activities, such as mining, caving, or climbing. They may offer additional features like higher waterproof ratings, adjustable beam angles, or additional safety features.
4. Key Features of Quality Flashlights and Headlamps
Brightness: Measured in lumens, brightness is a critical factor. More lumens mean brighter light. Flashlights can range from 50 lumens for general use to over 1,000 lumens for tactical or industrial applications.
Beam Distance: The distance a flashlight can project its beam effectively. This is important for tasks that require illumination at a distance, such as searching in the dark or signaling.
Battery Life: The length of time a flashlight or headlamp can operate before needing a battery replacement or recharge. Look for models with longer battery life, especially for outdoor or emergency use.
Durability and Waterproof Rating: Consider flashlights and headlamps made from durable materials like aluminum or reinforced plastic. An IPX rating indicates water and dust resistance; higher ratings (like IPX7) are better for wet environments.
Weight and Size: Consider the weight and size of the flashlight or headlamp, especially if portability is essential. Compact models are easier to carry but may have lower battery life or brightness.
Adjustable Brightness: Many models come with adjustable brightness settings or modes (high, medium, low) to conserve battery life or provide adequate light based on the task.
Comfort and Fit: For headlamps, adjustable straps and lightweight materials are crucial for comfort during extended wear. Look for padded straps or additional headband support for stability.
5. How to Use Flashlights and Headlamps Effectively
Choose the Right Brightness: Select the appropriate brightness level for your task. Use lower settings for close-up tasks to conserve battery life, and switch to higher settings for long-distance visibility.
Use Different Beam Patterns: If your flashlight or headlamp has multiple beam settings, choose between focused (spotlight) and wide (floodlight) beams based on your needs. A spotlight is useful for distance, while a floodlight is better for close tasks.
Maintain Your Equipment: Regularly check batteries, clean the lens, and inspect for any signs of wear or damage. Proper maintenance extends the life of your flashlight or headlamp.
Use in Emergencies: Keep a flashlight in your car, emergency kit, or bedside table. In case of a power outage or emergency situation, having a reliable light source can be invaluable.
6. Choosing the Right Flashlight or Headlamp for the Job
For Everyday Use: A compact LED flashlight with moderate brightness (around 100–300 lumens) is perfect for household tasks, walking the dog, or general use.
For Outdoor Activities: Consider a weather-resistant flashlight or headlamp with higher brightness (300–1,000 lumens) and long battery life for camping, hiking, or biking at night.
For Emergency Preparedness: A rechargeable flashlight or headlamp with multiple brightness settings and a long battery life is ideal for keeping in emergency kits or vehicles.
For Professional Use: Tactical flashlights or headlamps with high lumens, durability, and multiple settings are suitable for electricians, mechanics, and first responders.
7. Safety Tips for Using Flashlights and Headlamps
Avoid Direct Eye Contact: The bright light from flashlights and headlamps can damage eyes. Never shine a flashlight directly into anyone’s face.
Secure the Light Source: When using headlamps, ensure they are securely fastened to prevent them from slipping or falling off while you’re moving.
Be Aware of Battery Levels: Regularly check the battery life, especially before heading out for outdoor activities or emergencies. Always carry spare batteries or a backup light source when needed.
Use Caution in Hazardous Conditions: When using flashlights or headlamps in dark or unfamiliar areas, proceed with caution to avoid tripping or falling.
